

How To View Two Camera At One In Premiere
Multi-camera editing can seem like a scary concept mainly because it has a dissimilar feel and workflow to your normal editing processes. All the same, Premiere Pro Multicam editing is surprisingly straightforward! In one case yous have completed this tutorial, you'll know exactly how to set, edit, and troubleshoot your multi-camera projects.
Before we begin, let'due south clear one matter up, as thousand
Role i: How to Multicam Edit in Premiere Pro
Step ane: Create a Multicam Sequence
- Import your footage into your project.
- In the Project Browser, select the clips that you want to utilise in the Multicam sequence (hold Cmd or Ctrl while selecting multiple clips).
- Correct-click 1 of the selected clips and click Create Multi-Photographic camera Source Sequence.
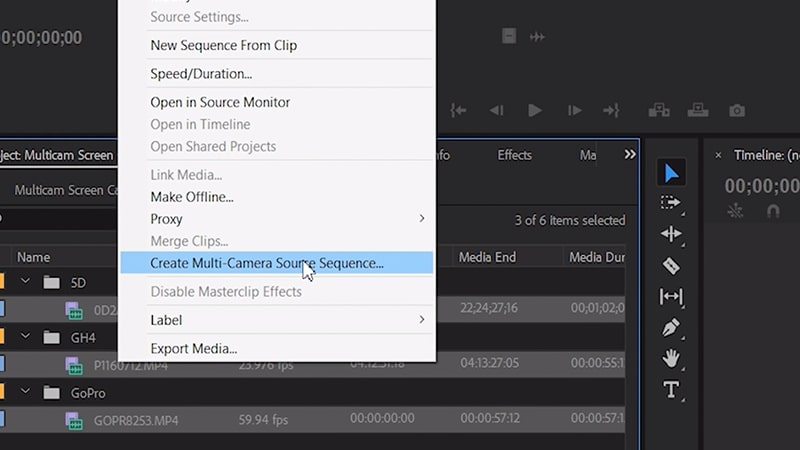
- Proper noun the project; we will use Intro or Question 1 (choose something that references which source clips are being used).
- Choose your Synchronize Point settings. It's most probable that you'll need to use the Audio option; leave the Track Channel at Mix Downwards.
- Fix the Sequence Preset > Automated.
- Unless yous have renamed your clips during pick, bank check the Enumerate Cameras box. Click OK, and you're all set up.
Footstep 2: Gear up Up the Sequence
- Find your new sequence in the Project browser, correct-click and choose New Sequence from Clip.
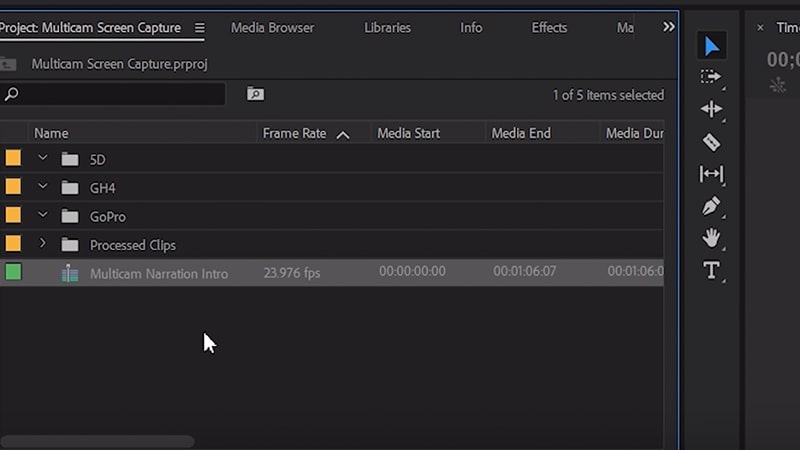
- You'll now have one clip in your timeline, with a single audio track.
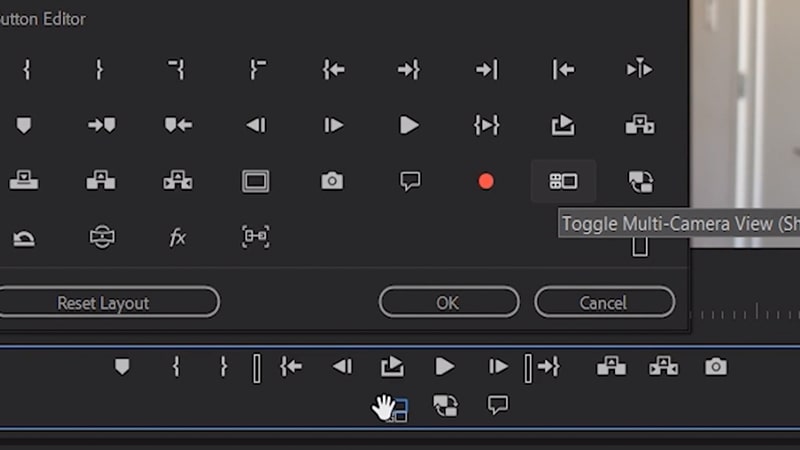
- Go to your Button editor, then select the multi-camera editing icon, Multi-Camera View.
- Elevate the icon and driblet it on your button bar.
- Click OK to shut the Button editor, and so click on the multi-camera icon in the button bar to open the multi-camera view.
Step 3: Overlay Settings
Adding the Overlay settings isn't a necessity, but we strongly recommend you practise. The overlay adds a number to each of the clips that make upward your Multicam clip. Toggling this on allows you to use hotkeys to cutting betwixt camera angles.
- Become to the Program Monitor and click on the settings wrench icon, select Overlay Settings.
- In the setting box, check Enable Overlays during playback, followed by OK.
- Become dorsum to the wrench icon and select Overlays.
Step 4: Edit & Switch Camera Angles
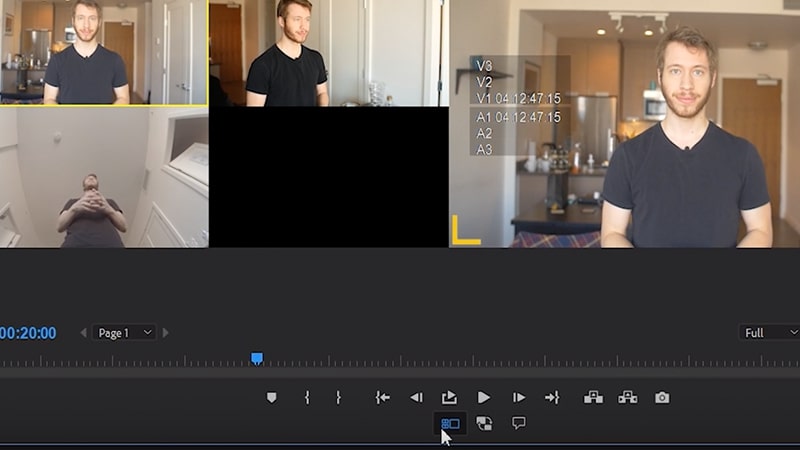
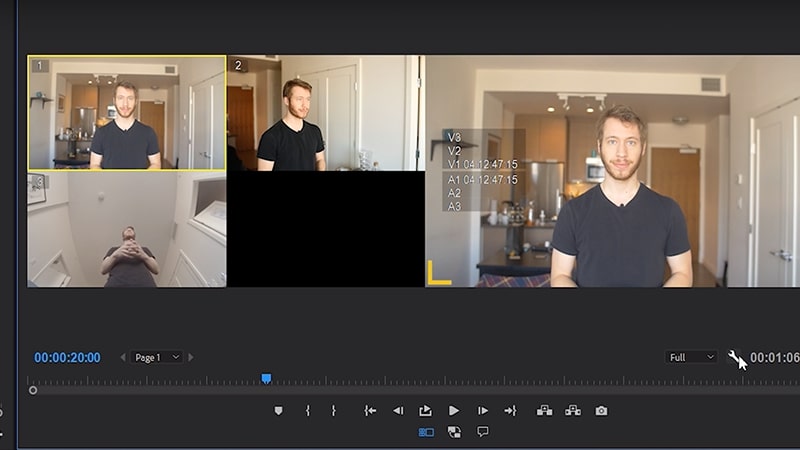
The largest of the windows in the Program Monitor is your Active camera. This displays the main video sequence. The smaller windows display the individual clips that make up the multi-camera clip.
In that location are 2 means to edit between camera angles:
- Play through the sequence until y'all reach a bespeak that you would similar the camera angles to change, click on the camera angle in the Program Monitor. Premiere Pro will add an edit, switching to that angle.
- Play through the sequence until you accomplish a point that you would similar the camera angles to change. Using your keyboard, press the number allocated to the camera angle.
To reorganize your camera angles, selectEdit Cameras. From here, y'all can easily drag-and-driblet the clips to change the gild. If you lot want to disable an angle you no longer want to use just deselect it by clicking on the checkbox. If you have more than four angles to manage, yous can organize and select cameras beyond multiple pages, and navigate between them equally needed.
With practice, multi-photographic camera editing can be quite a quick procedure, as you tin make cuts while the video is playing.
Office ii: Adjust & Refine Your Multi-Camera Sequence
1. Delete an Edit
Removing a cutting is super unproblematic:
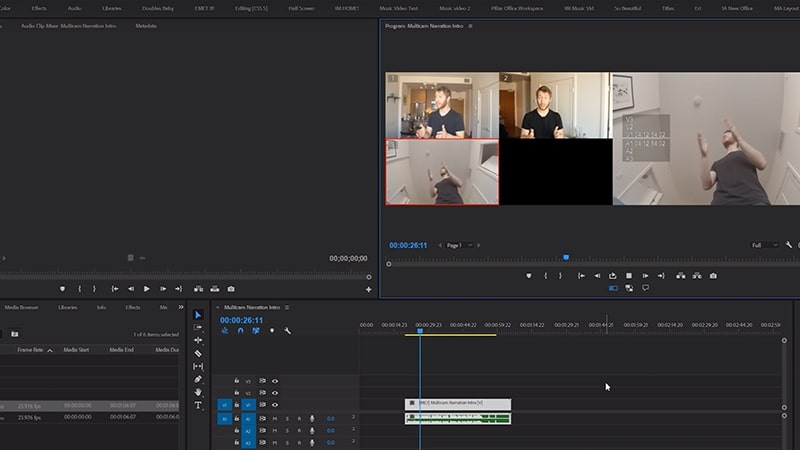
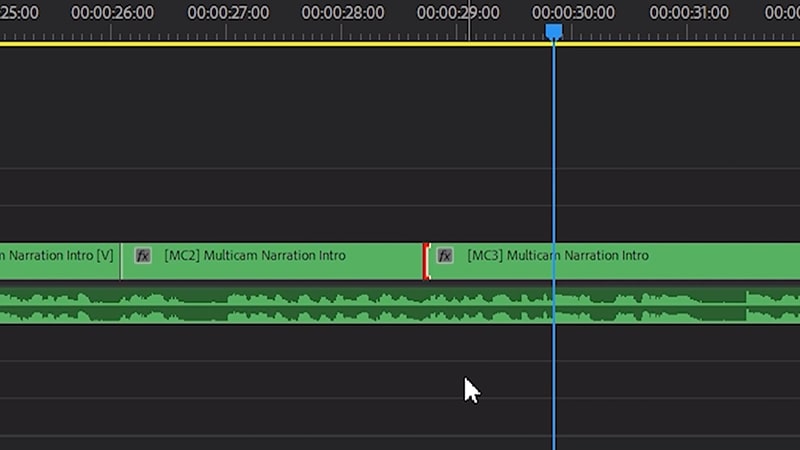
- Zoom in to your sequence then that you lot can see the cuts between in the clip. You'll run into each has a label indicating the camera angle.
- Select the point between 2 clips and hit Delete. The edit will be deleted, and the clip volition revert to the angle of the clip before it.
2. Irresolute an Angle Subsequently an Edit
You lot might decide that you need to swap the angle used for a particular edit without deleting and redoing the edit signal. Simply select the clip, and click on a different bending.
3. Changing the Edit Bespeak
If you want to keep the photographic camera angles the same, simply slightly adjust the edit point, you can do so using the Rolling Edit tool:
- Striking N on the keyboard to switch the Rolling Edit tool.
- Grab the edit point you wish to modify and elevate forth the sequence to reposition the cutting.
Part 3: Tips & Troubleshooting
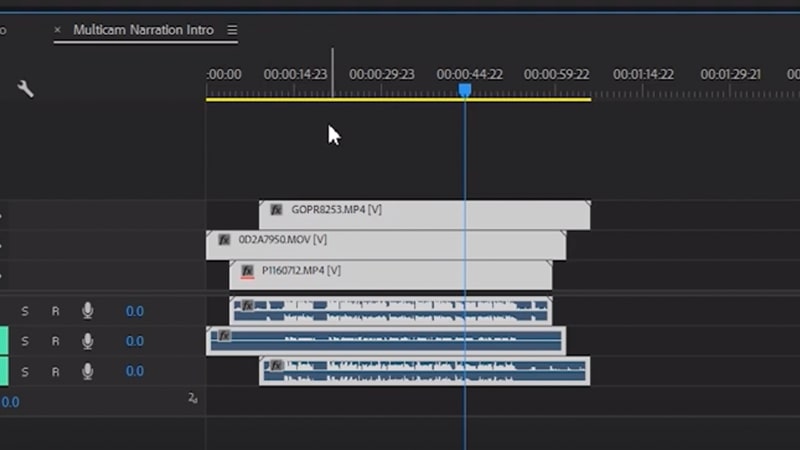
Some issues may ascend for which you need to edit the source footage. To practice this, you demand to open the multi-photographic camera prune.
- Detect the Multi-Camera clip in your Project browser. If you have problems finding it, right-click on the clip in the sequence, and select Reveal in Project.
- In the Projection browser, right-click on the Multi-Camera clip and select Open in Timeline. From here you can edit each source clip.
1. Audio Syncing
Occasionally, the audio in your clips will not be clear enough for Adobe to sync the clips correctly. In this instance, you may need to do a fleck of manual syncing. Open up the multi-camera clip and accommodate the position of the source files, and then they sync, using the visuals every bit a guide. This is where using a clapper board becomes invaluable.
2. Replacing Clips
If you have created your new multi-camera clip using the incorrect source file, it's often easier to delete the new clip and redo it. There are many reasons, notwithstanding, that you may have started editing when you need to change the source files.
- Open the clip to reveal the source files.
- Right-click on the source file y'all wish to supercede, select Reveal in Projection.
- In the Project browser, right-click on the source clip and select Supplant Footage.
- Find the clip you lot wish to replace, and select OK.
3. Color Correction
You tin add color correction and grading, along with other artistic video effects by opening the Multicam clip. From in that location, apply the effects directly to the source files. The effects you utilize to the source clips will affect the whole clip and every instance it's used inside the edit.
Multi-camera editing is quite straightforward! One time you have gear up upwardly the project, editing between the various angles is fun. Now that yous know how to utilise Premiere Pro Multicam editor, practise, and you'll be surprised how quickly you tin create complex edits.
Source: https://motionarray.com/learn/premiere-pro/premiere-pro-multicam-editing-tutorial/
Posted by: lowewincert.blogspot.com
0 Response to "How To View Two Camera At One In Premiere"
Post a Comment